Image of the day

Captured by
RICHARD COFER

Waxing Crescent Moon

My Account

New to Astromart?

Register an account...

Need Help?

SCT Collimation eyepiece?

Started by bigtasty25, 12/22/2009 01:57AM
Posted 12/22/2009 01:57AM Opening Post
I recently traded in my 16" lightbridge for a Nexstar 11 GPS carbon fiber...alot more suitable for my suburban area and astrophotography i wanna get into in the future. When i recieved the scope and tried it out, it was a little flurry on stars (they looked ellipital, like an infinity sign...you know..with a tail like a comet)...i tried collimating it by turning the 3 screws at the front of the OTA...BAD idea...became even blurrier =(

Im having trouble getting it back into focus...ive never really collimated before and would prefer an easier way to do it then the complicated prodedure i found on google.

I DID see they DO have a collimating laser eyepiece for SCT's availble now..here is the link...(kendrick has one too i believe)
http://www.agenaastro.com/HoTech-2-1-25-SCA-Laser-Collimator-p/palc-ht-sca-2.htm

What is everyones opinion? id prefer having a quick handy tool where i can quickly align the optics often since i want to get into astrophotography within the next 6-12 months as well..
thanks!
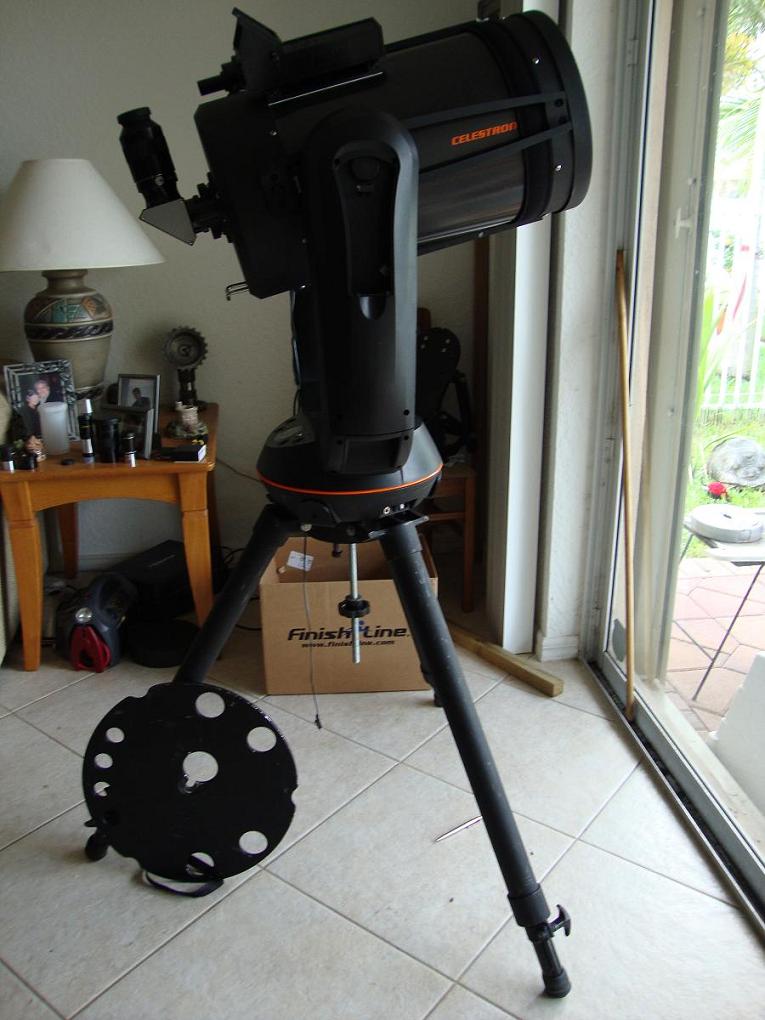

Attached Image:

bigtasty25's attachment for post 49489
Posted 12/22/2009 04:29AM #1
Hotech makes good collimators. I know the company displayed (at PATS) a collimator specifically made for SCTs. It involves more than the product you have referred to here. This is their 1.25/2 inch collimator, and is great for NEWTS. It does work for SCTs I hear, although I have never tried it.

Unfortunately for you, however, step one in using the Hotech collimator is to collimate your scope (without the collimator). In other words, you have to start with a collimated scope. Then you mark on your collimator's white target area just where your red dot lands. Next time you need to collimate, you simply put the collimator in the same position, and turn it on. Make sure the red dot is on that point you marked and you are collimated.

A couple of collimation hints.

Get somebody who knows how to do it assist you.

Use a display (camera hooked up to scope, showing results on a nearby monitor screen).

Or, get somebody else to turn the knobs while you watch from the eyepiece end.

Any of these things will soon make it pretty easy to get it collimated.

Alex
Posted 12/22/2009 12:16PM #2
I am certainly no expert, but I recently set up my first SCT, a c8 Classic. While the collimation was close when I received it, adjustment was necessary and I found it relatively easy to do. One thing I found indispensible was Bob's knobs (or their equivalent from another manufacturer). They are easy to install and easier to use than an allen wrench in the dark. Since your scope is not collimated now it is a perfect time to get them as you would have to adjust the secondary anyway after putting them on.
Posted 12/22/2009 01:49PM #3
mike selz said:

I recently traded in my 16" lightbridge for a Nexstar 11 GPS carbon fiber...alot more suitable for my suburban area and astrophotography i wanna get into in the future. When i recieved the scope and tried it out, it was a little flurry on stars (they looked ellipital, like an infinity sign...you know..with a tail like a comet)...i tried collimating it by turning the 3 screws at the front of the OTA...BAD idea...became even blurrier =(

Im having trouble getting it back into focus...ive never really collimated before and would prefer an easier way to do it then the complicated prodedure i found on google.

I DID see they DO have a collimating laser eyepiece for SCT's availble now..here is the link...(kendrick has one too i believe)
http://www.agenaastro.com/HoTech-2-1-25-SCA-Laser-Collimator-p/palc-ht-sca-2.htm

What is everyones opinion? id prefer having a quick handy tool where i can quickly align the optics often since i want to get into astrophotography within the next 6-12 months as well..
thanks!

Forget lasers and collimation eyepieces. Get down to your local club and get some h-e-l-p. Someone who's experienced with these telescopes needs to have a look at yours and give you a hand!

Uncle Rod

Time on your hands?
Waste it with Uncle Rod's Astro Blog!

http://uncle-rods.blogspot.com/
Posted 12/22/2009 02:42PM #4
All you need is a little knowledge, a little patience, and
a screw driver. As Rod suggested, get yourself to a club
and find someone who knows what they are doing.
Posted 12/22/2009 04:42PM | Edited 12/22/2009 05:15PM #5
Mike,

Collimation in the daytime will help you understand the process. Hang a round silver Christmas ornament up across your yard (or in the neighbor's yard if necessary) such that you can see the reflection of the sun from the position of your scope. Focus on this reflection and center it in the FOV using a high power eyepiece, a green filter (Note 1) if you have one, and NOT using a diagonal. Next slightly defocus the image to see the expanded diffraction ring pattern (three to five rings. Note 2). The image in the eyepiece should appear to be a bullseye; the dark center is the secondary position. *Slightly* loosen the three collimation screws, one at a time, noting the effect to collimation. Don't loosen them too far...just enough to provide a bit of room for +/- adjustment in each. The goal is to achieve a concentric ring pattern (i.e. centering the secondary shadow inside the diffraction rings) while *tightening* each of the screws a little at a time until they are just snug.

Be aware that those screws, in addition to setting collimation, also hold the secondary in place. Turn them all too far in one direction (too loose) and the secondary can detach from the corrector plate and fall into tube and the primary mirror! Perfoming this with the tube parallel to the ground is a good idea for beginners. (Hang the ornament at the height of the scope and you'll avoid any serious problem!)

Don't be afraid. Develop an understanding the proper procedure and it soon will be second nature to you. As suggested if you can find and experienced individual to walk you through it once you'll see it is an easy thing to master.

Replacing the stock collimation screws with Bob's Knobs will simplify the whole collimation process. It eliminates having to manipulate a tool (no screwdriver or allen wrench required). Installation of Bob's Knobs requires you to remove the secondary screws, *one at a time*, and replacing them with Bob's Knobs. They make it a breeze to touch up collimation under the stars in the dark (Note 3).

Notes:

1) The green filter (or better yet, a Baader Solar Continuum filter) will pass a narrow band of light through making the diffraction pattern easier to discern.

2) If you are too far out of collimation and cannot see diffraction rings then strongly defocus to see the off-center shadow of the secondary and rough-center the shadow inside the white ring. then return to a slight out-of-focus setting to see the diffraction rings.

3) Let the tube reach thermal equalibrium at night to fine tune collimation while pointing at a bright star.


Refer to http://legault.perso.sfr.fr/collim.html for more collimation details and reference images

-Gary
    There is only one constant in our infinite universe; it is change.
    D&G 8” f/15, AP178 f/9, C11, C8, ED80, TV-85, TV101&102, SW120ED, 6"Cave f/8, Solarmax 40, ES127MC,
    DM-6, Losmandy Titan 50 GEQ, G11, AP800, ES Twilight-1, UA Unistar Deluxe, WO EZ-Touch, 
    Denk BVs, 7x50 Fujinons, 10x50 Nikons, 15x70 Astrophysics, 16x70 Fujinons, 22x100 Oberwerks, 
    Sim Picheloup CPT, Canon 40D, 60Da, Vixen Polarie, SXV-H9, DMK 41AU02, DBK 21AU618, 
    Shelyak Lhires Lite Spectroscope, Rainbow Optics Spectroscope, Field Tested Systems RSPEC,
    Chairman, Southwest Region of the Astronomical League (SWRAL)
    President Emeritus, Historian, AL Awards Coordinator, Texas Astronomical Society of Dallas (TAS)
    Member/Volunteer, 3RR Comanche Springs Astronomy Campus (CSAC)
    ALCOR, Advisor to the Board, Texas Star Party (TSP)
    NASA-JPL Solar System Ambassador Volunteer (SSA)